
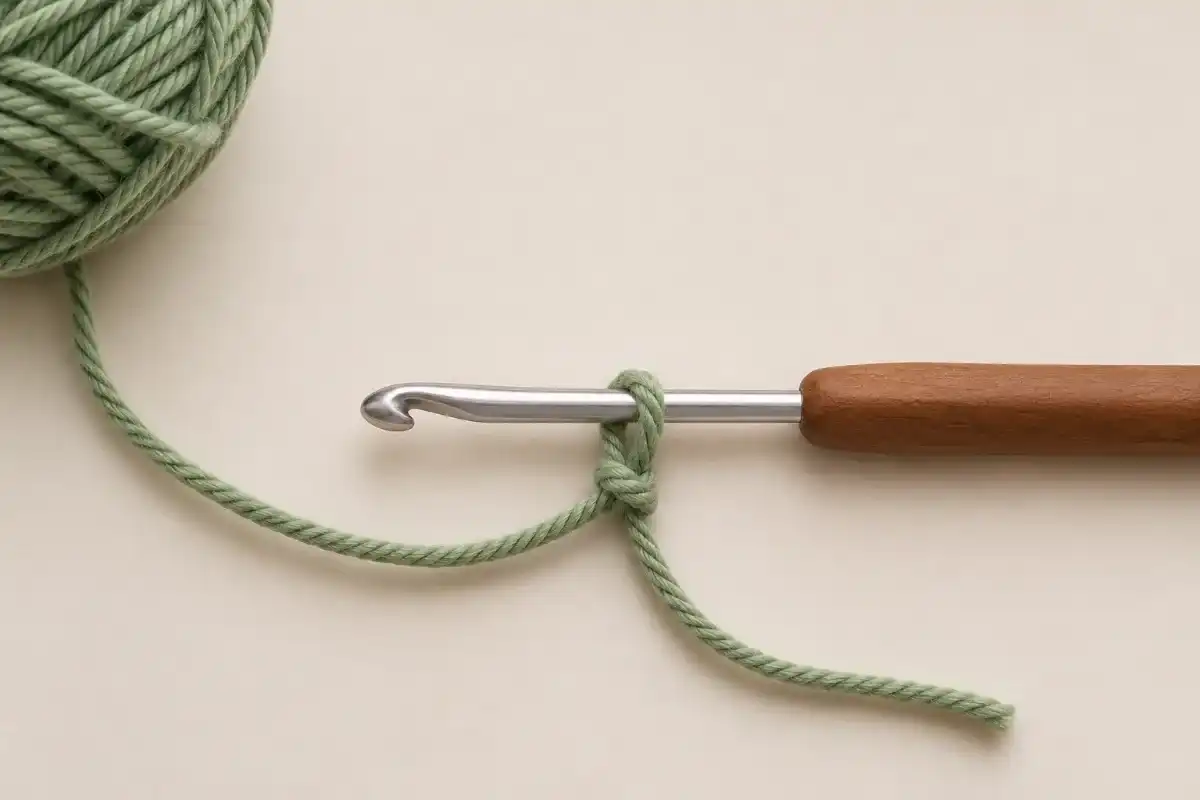
Illustration: a crochet starting loop on the hook; check its adjustment while practising.
Quick answer: Make a loop in the yarn, draw a folded section of the working yarn through it, place the new loop on your hook and gently tighten the knot beneath it. Leave enough tail to weave in later. In crochet, the slip knot does not count as a stitch.
All links checked: November 16, 2026. Every reference below links to its source: Lion Brand, the Craft Yarn Council and Sarah Maker.
Looking for something specific? Try our Pattern Finder to filter every pattern by skill level, time, sewing and hook size.
A crochet slip knot gives you an adjustable loop to place on your hook before making a starting chain. If your first loop keeps tightening, slipping off or turning into a fixed knot, slow down and check which strand you are pulling.
Below are two ways to form that starting loop: with a hook or with your fingers. Learn one first, check that the loop adjusts, then practise making your first chains.
Before You Start: Find the Working Yarn and Tail
Pull some yarn from the ball and identify the two sides:
| Yarn part | How to recognise it | What to remember |
|---|---|---|
| Working yarn | The strand that continues to the ball | Use this strand to make your crochet stitches. |
| Tail | The free cut end | Leave it available to weave into the finished work. |
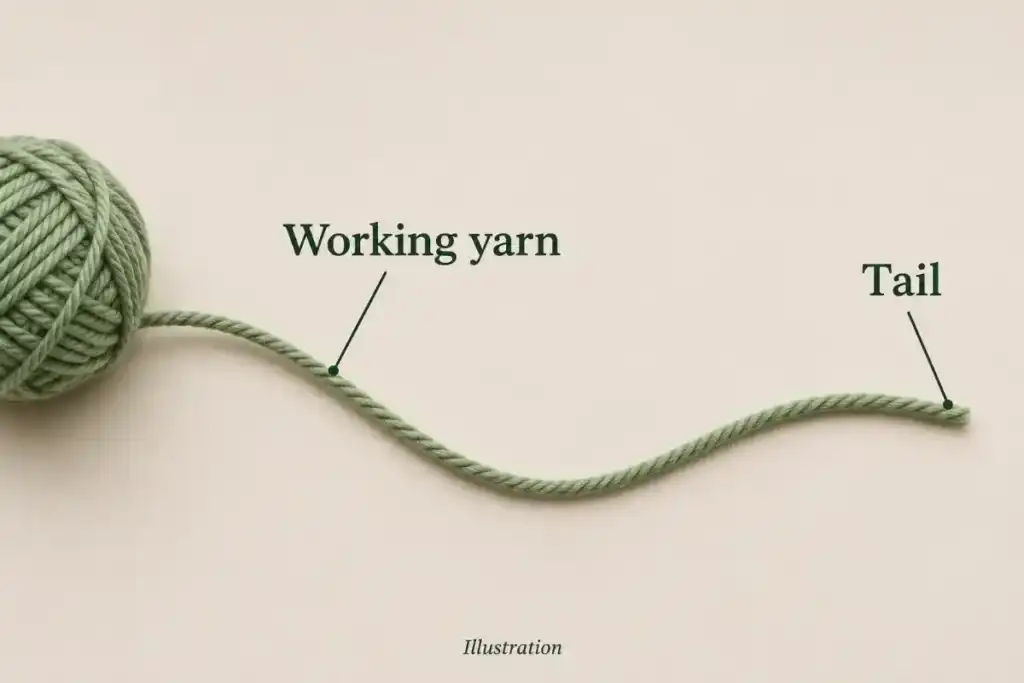
For practice, leave about 6 inches / 15 cm of tail. That is a starting allowance, not a rule for every yarn or project; follow any finishing instructions in your pattern.
Use yarn you can see clearly and a hook appropriate to it. Avoid hiding the crossing point behind your fingers while you learn. You can set everything down between steps.
The Sarah Maker slip-knot tutorial also distinguishes the working strand from the tail and provides photographed demonstrations.
How to Make a Slip Knot for Crochet: Hook Method
Keep the yarn loose while forming the knot. Tighten it only after the new loop is on your hook.
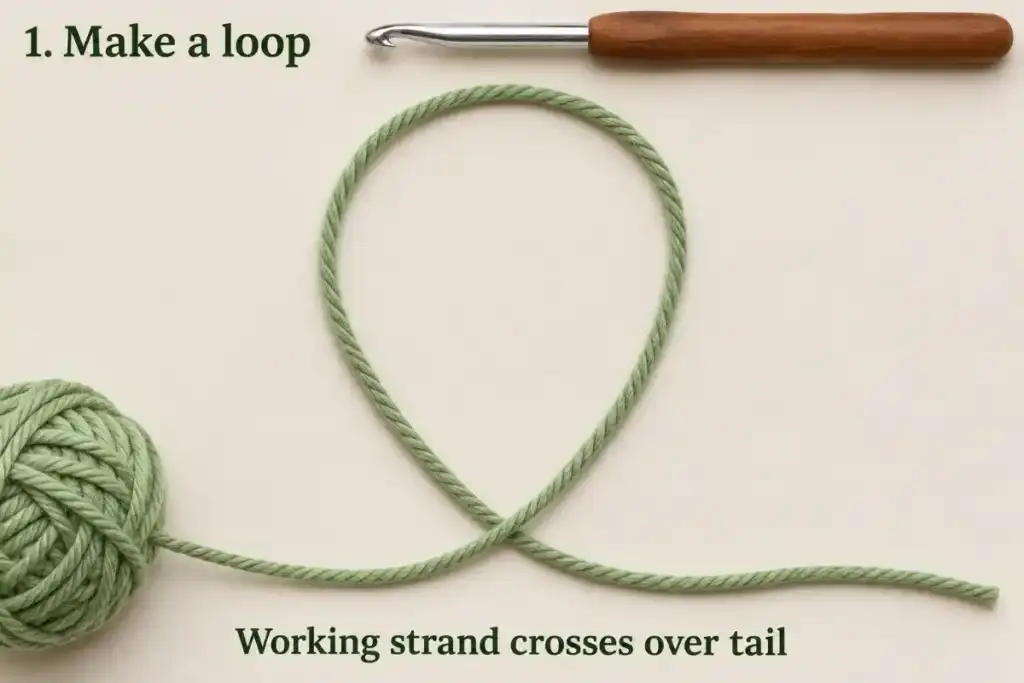
Step 1: Form the starting loop
Lay the yarn on a table. Make one loop by crossing the working strand over the tail, leaving the tail allowance intact.
Step 2: Catch a fold of working yarn
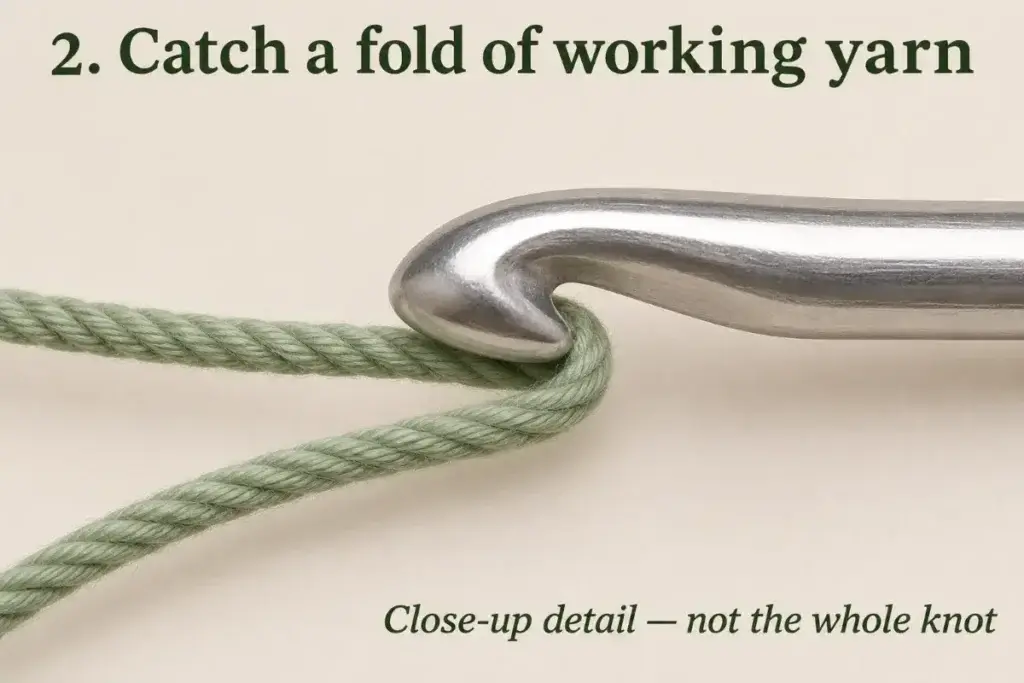
Put the hook through the opening and catch a small section of the strand leading back to the ball. Catch a fold, not the cut end. The close-up below isolates the fold; keep the original starting loop in place while you work.
Step 3: Draw up the new loop
Pull that fold through the original opening. Keep the new loop on the hook while gently drawing the original loop closed around its base.
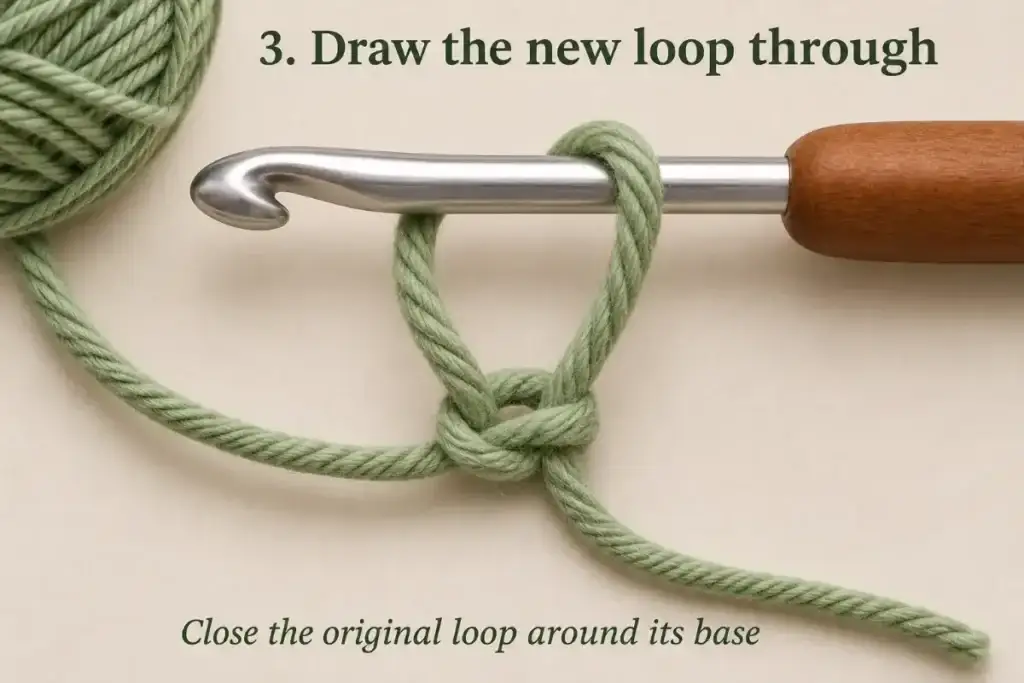
Step 4: Adjust on the shaft
Let the loop rest on the hook’s straight shaft rather than its narrow tip. Adjust it gently until it sits around the hook without clamping it. Test the movement yourself; the still illustration cannot demonstrate that it slides.
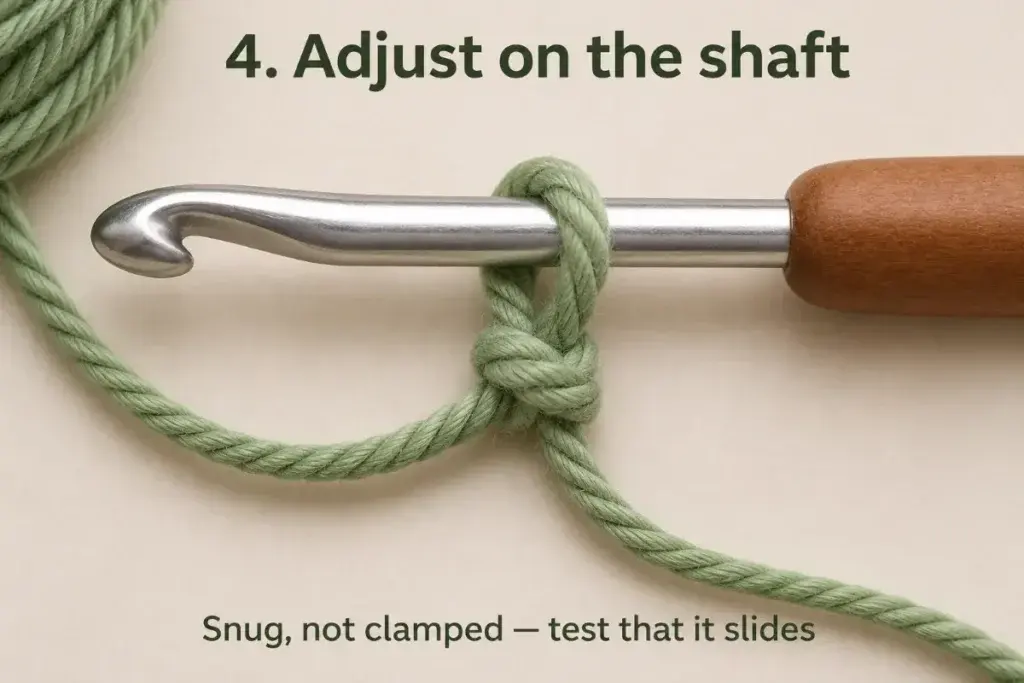
Stop and check: you should have one loop on the hook and a small knot beneath it. The hook should be able to move through the loop without being forced.
If you pulled the free end all the way through instead of a folded section, undo the practice knot and restart. That produces a different result from leaving an adjustable loop on your hook.
Alternative: Make the Slip Knot With Your Fingers
Use this when you find it easier to feel the yarn before picking up the hook. It forms the same kind of starting loop using your fingers to draw the fold through.
- Make the loose starting loop as above and hold its crossing point between your fingers.
- Reach through the opening with your other hand and pinch a folded section of the working yarn.
- Bring the fold through the opening, leaving it as a loop. Keep hold of it while gently closing the original loop around its base.
- Put the crochet hook into the new loop and adjust it on the shaft. Check the tail length before you continue.
Choose whichever handling method is easier to follow. You do not need to master several variations to begin a starting chain.
How to Check Your Crochet Slip Knot
Before chaining, look for three things:
- A usable loop: the hook sits inside one adjustable loop.
- A manageable fit: the loop can slide along the shaft; it is neither clamped tight nor hanging as a large uncontrolled loop.
- A retained tail: the free end has not disappeared into the knot.
The strand that changes the loop can differ with how a slip knot was formed. Test the adjustment gently rather than assuming every demonstration uses the same orientation.
A correct-looking still image cannot prove that a loop slides. Try the movement yourself before starting the chain.
Slip Knot Problems and How to Fix Them
| What happens | Check | What to try |
|---|---|---|
| The loop grips the hook too tightly | Whether you tightened around the narrow tip or pulled hard on both strands | Loosen the loop and adjust it on the straight shaft. |
| The loop keeps falling off | Whether it is much larger than the hook and unsupported | Reduce the loop gently and hold the knot’s base while you begin. |
| You made a fixed knot with no usable loop | Whether the cut end went completely through the opening | Undo it and draw a fold through instead. |
| The tail is too short | Whether the knot used up the finishing allowance | Restart while it is still only a practice knot and leave more tail. |
| Pulling one strand gives an unexpected result | Knot orientation and which strand you are holding | Trace the strand to the ball or free end, then adjust gently. |
| The yarn splits while you pull it through | Whether the hook caught only part of the strand | Release it and catch the whole strand without forcing it. |
If you are repeatedly losing the crossing point, practise on the tabletop before holding the yarn in the air. For later stitch-count and tension issues, see our common crochet mistakes guide.
Does the Slip Knot Count as a Stitch in Crochet?
No. Do not count the starting slip knot as a chain stitch. The active loop on your hook is not a completed chain either.
If a pattern says ch 5, make five completed chains after the slip knot. Count the five V-shaped chain links below the active loop. Do not add the knot as a sixth stitch.
Lion Brand’s chain-stitch instructions explain this counting distinction. It is especially useful if you have learned knitting, where slip-knot counting can differ.
Practise: Make a Slip Knot and Five Chains
This is a short practice exercise, not a finished project pattern.
- Make the slip knot and check that it moves on the hook.
- Hold the knot’s base so it does not swing around while you work.
- Bring the working yarn over the hook and draw it through the existing loop. You have made one chain and have a new active loop on the hook.
- Repeat until you have five completed chains.
- Stop and count the five links. Exclude the knot and the active loop.
If the first chain will not form, check the loop’s tightness before pulling harder. If the chain is difficult to hold, move your supporting fingers closer to the work as it grows.
Your next pattern may ask for a different chain count. The Craft Yarn Council’s guide to reading crochet patterns explains how the starting chain fits into the instructions. Our beginner pattern-reading guide is another place to practise interpreting them.
Slip Knot vs Slip Stitch: What Is the Difference?
| Term | What you are making | What to recognise |
|---|---|---|
| Slip knot | An adjustable starting loop | It puts yarn on the hook; it is not a counted starting chain. |
| Chain stitch, ch | A new chain link drawn through the active loop | A series of completed links forms a starting chain. |
| Slip stitch, sl st | A stitch worked through an existing stitch or space as directed | It is a separate technique from tying the starting knot. |
For a slip stitch, the hook enters the specified place in the work, catches the yarn and draws it through that place and the loop already on the hook. See Lion Brand’s slip-stitch demonstration.
Learning a slip knot does not automatically teach you a slip stitch. Keep the names separate when reading a pattern.
Crochet Slip Knot Questions
Can I make a slip knot without a crochet hook?
Yes. Use your fingers to form the loop, then put it onto the hook. You still need to check its fit before crocheting.
Is a slip knot the same as a magic ring?
No. This tutorial creates a loop on the hook before a starting chain. A magic-ring start has you work stitches into an adjustable ring. Follow the start specified in your pattern instead of substituting one automatically.
Do all crochet projects start with a slip knot?
No. Many starting chains do, but other starts exist. Use the instructions for the project you are making rather than treating one method as compulsory for every pattern.
Can I use these instructions if I am left-handed?
The adjustable-loop construction is the same. You may prefer to swap the hands holding the hook and yarn. If following photographs, use a consistent left-handed sequence so the changing orientation does not hide the crossing point.
Why is my slip knot too tight?
Check whether you cinched it against the narrow tip or pulled hard while closing it. Loosen it and adjust around the shaft; do not force the hook through a clamped loop.
Which slip-knot method is best for beginners?
Start with the one whose yarn path you can follow. The tabletop hook method lets you pause and inspect the crossing; the finger method may feel easier once you understand the loop. A successful adjustable loop matters more than choosing a particular variation.
Ready for Your First Crochet Instructions?
Practise until you can form the loop, adjust it and make five chains without counting the knot. Then use your chosen pattern’s chain count and first-row instructions. Next, learn the six basic crochet stitches that follow the chain.
For help with unfamiliar abbreviations, continue to How to Read Crochet Patterns. Use the original designer’s materials and starting instructions when moving from practice to a project.
Sources and scope
This is an editorially researched beginner lesson, with linked instructional references. It is not presented as a Crochet Lantern hands-on test. The illustrations are AI-generated and labelled as illustrations; a realistic appearance does not prove a knot or stitch is correct, so follow the written steps if an image and the text ever seem to differ.
Browse all our crochet stitch tutorials, or see every collection in learn-to-crochet guides.