
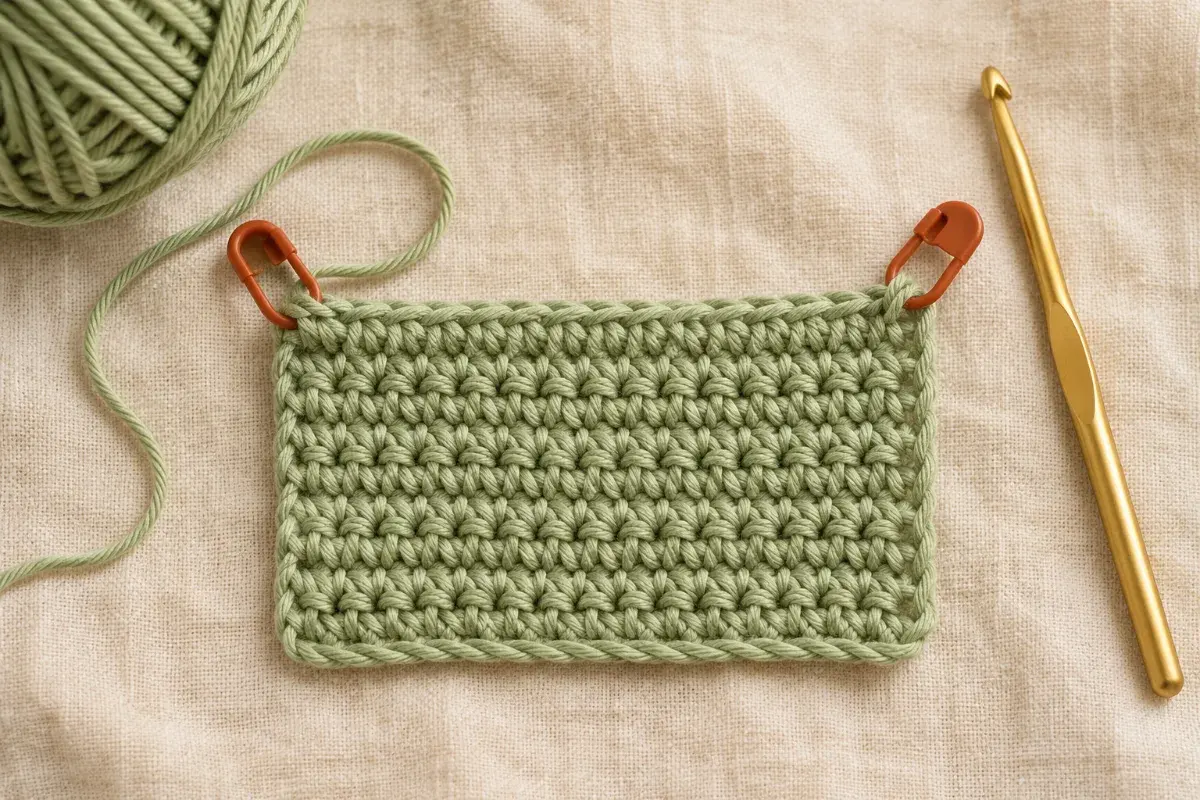
Illustration: a practice swatch with edge markers. This is not the measured result of the exercise below.
Quick answer: The six basic crochet stitches are chain, slip stitch, single crochet, half double crochet, double crochet, and treble crochet. Learn the chain first, then practice single crochet before moving to the taller stitches.
All links checked: November 16, 2026. Every technical reference below links to its source: the Craft Yarn Council and Lion Brand.
Ready for a first project? Try our Pattern Finder to filter every pattern by skill level, time, sewing and hook size.
This guide uses US crochet terminology. You will find the steps for each stitch, a US/UK reference chart, and a small practice exercise with a stitch count you can check after every row.
Basic crochet stitches chart
Keep this table beside your project. The UK column translates the stitch name; it does not describe a different way to make it.
| US stitch | Abbreviation | UK equivalent | What it helps you do |
|---|---|---|---|
| Chain | ch | Chain | Make a starting chain or a space |
| Slip stitch | sl st | Slip stitch | Join or move across stitches with little height |
| Single crochet | sc | Double crochet | Make short, compact stitches |
| Half double crochet | hdc | Half treble crochet | Build a medium-height fabric |
| Double crochet | dc | Treble crochet | Make taller stitches for many common projects |
| Treble crochet | tr | Double treble crochet | Create tall stitches and more open designs |
Single crochet in a US pattern means double crochet in a UK pattern. Check the terminology before following any tutorial, especially when a pattern says “dc.”
What you need before you start
Choose a smooth, light-colored yarn so you can see each loop. A medium-weight yarn and a compatible hook are a practical starting point; use the yarn label to choose the hook rather than assuming one size fits every yarn. You also need scissors, a yarn needle, and two removable stitch markers.
Avoid fuzzy, very dark, or highly textured yarn for your first practice rows. Those yarns can make it harder to see where the hook should go.
Make an adjustable slip knot and place it on the shaft of the hook. The yarn connected to the ball is the working yarn; the free end is the tail. A yarn over means catching the working yarn over the hook, usually from back to front.
The slip knot starts the work, but it is not a counted chain or stitch. The live loop on your hook is not counted either.
Where to insert your hook
Look at the top of a completed stitch: its two loops form a small V. For the stitches below, insert your hook under both top loops of the indicated stitch unless the pattern tells you otherwise.
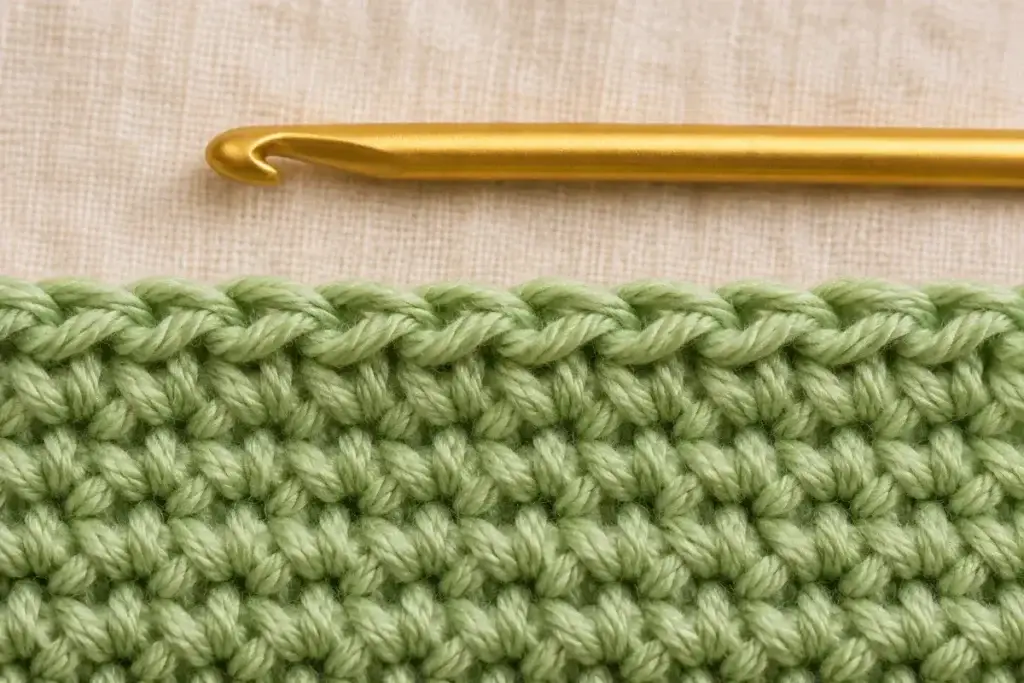
A starting chain looks different. Each chain has a V on its front and a small bump on its back. For the single crochet exercise below, work under the back bump of each chain. Other patterns may use a different chain-insertion method.
Keep the loop on the wider shaft while sizing it. Tightening every loop against the narrow throat can leave stitches difficult to work into.
1. Chain stitch: ch
The chain stitch makes a linked strand of loops. It often forms the foundation for a project worked in rows.
- Begin with one adjustable loop on your hook.
- Yarn over with the working yarn.
- Draw that yarn through the loop already on the hook.
- You have made one chain. Repeat the yarn-over and pull-through movement for more chains.
One live loop remains on the hook after each chain. Count the completed V shapes below it, not the live loop or the slip knot.
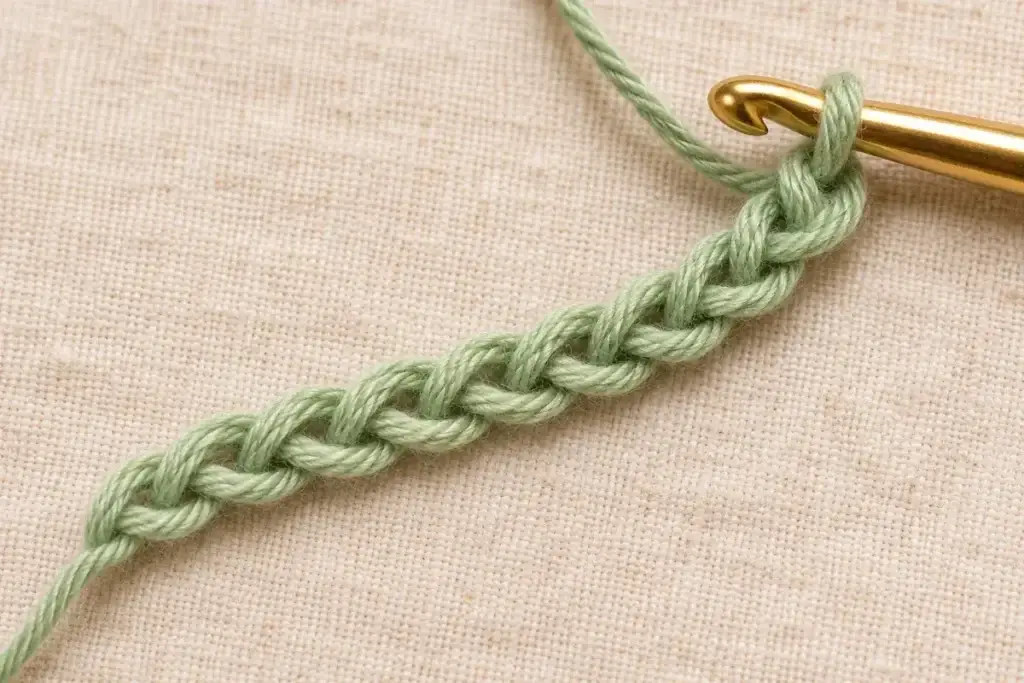
Try it: Make 11 chains and count them from the hook toward the starting knot. If you cannot pass the hook comfortably through a chain, loosen your grip and try again before adding more stitches.
2. Slip stitch: sl st
A slip stitch joins or travels across work without building much height. It is different from a slip knot: the knot starts your yarn, while a slip stitch is worked into existing work.
- Start with one loop on the hook.
- Insert the hook into the indicated stitch or chain.
- Yarn over and draw the yarn through the insertion point and through the loop already on the hook.
One loop remains. Think through the work, then through the live loop, as one continuous pull-through.
Keep slip stitches relaxed. Pulling them tight makes their tops hard to enter later. When joining a round, insert into the stitch named by the pattern; the first stitch and the top of a turning chain are not interchangeable.
3. Single crochet: sc
Single crochet is a useful first stitch to practice in rows because its short posts make counting and checking edges manageable.
- Insert the hook into the indicated stitch.
- Yarn over and pull up a loop. You now have two loops on the hook.
- Yarn over again and pull through both loops.
One loop remains, and the stitch is complete. You do not yarn over before inserting the hook for a standard single crochet.
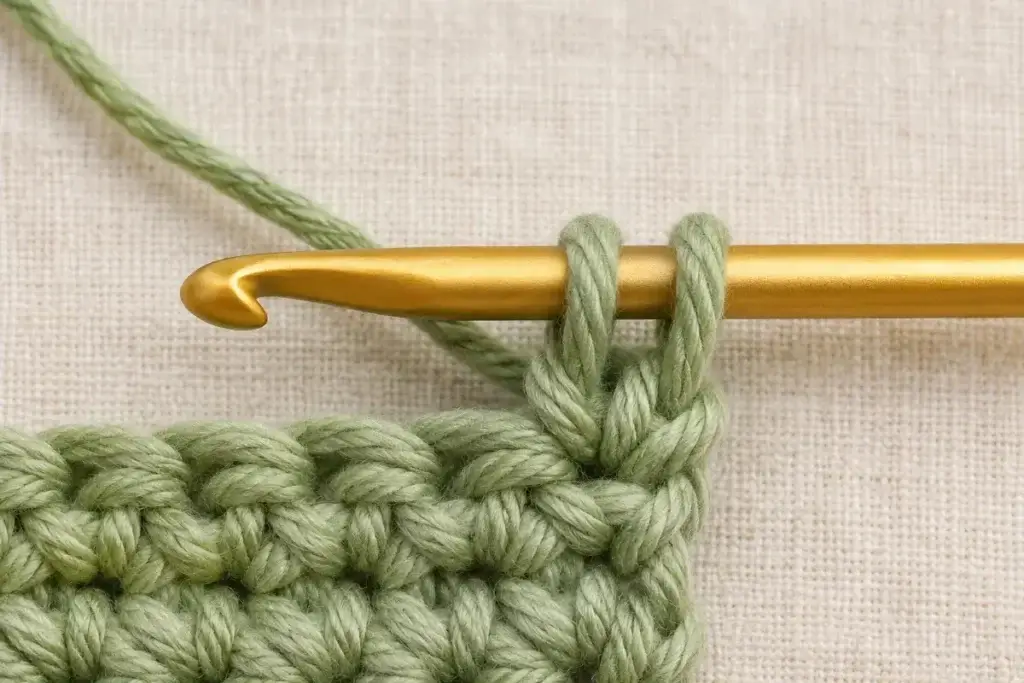
In a foundation chain, the practice exercise below starts in the second chain from the hook. In later rows, work under both top loops of each single crochet.
Single crochet is often used in amigurumi, but a toy pattern also needs shaping, stuffing guidance, and suitable tension. Learning this stitch alone does not make every toy pattern beginner-friendly.
4. Half double crochet: hdc
Half double crochet adds a yarn over before insertion. The finishing movement draws through three loops together.
- Yarn over once.
- Insert the hook into the indicated stitch.
- Yarn over and pull up a loop. There are three loops on the hook.
- Yarn over and pull through all three loops.
One loop remains. If the hook catches on the middle loop, turn its opening slightly downward as you draw through, without tightening the yarn.
Do not finish this stitch in two separate pull-through-two movements: that makes a double crochet instead.
5. Double crochet: dc
Double crochet starts like half double crochet but finishes in two stages. In US terminology it is abbreviated dc; a UK dc is a different stitch.
- Yarn over once.
- Insert the hook into the indicated stitch.
- Yarn over and pull up a loop: three loops are on the hook.
- Yarn over and pull through two loops: two loops remain.
- Yarn over and pull through the remaining two loops.
One loop remains. A useful memory aid is through two, through two.
Double crochet appears in many granny squares and blankets. The placement of the stitches matters: working into a chain space, between posts, or under top loops produces different results. Follow the placement instructions in your pattern.
6. Treble crochet: tr
Treble crochet, also called triple crochet in US terminology, begins with two yarn overs and finishes with three pull-through-two movements.
- Yarn over twice.
- Insert the hook into the indicated stitch.
- Yarn over and pull up a loop: four loops are on the hook.
- Yarn over and pull through two loops: three remain.
- Yarn over and pull through two loops: two remain.
- Yarn over and pull through the final two loops.
One loop remains. Keep the initial wraps relaxed enough to move along the shaft, but avoid stretching the pulled-up loop much taller than the surrounding stitches.
Compare the four main fabric stitches
Read “initial yarn overs” as the wraps made before inserting the hook. Every completed stitch below ends with one live loop.
| Stitch | Initial yarn overs | Loops after pulling up yarn | Finish |
|---|---|---|---|
| sc | 0 | 2 | Yarn over; through both |
| hdc | 1 | 3 | Yarn over; through all three |
| dc | 1 | 3 | Yarn over; through two, twice |
| tr | 2 | 4 | Yarn over; through two, three times |
Half double and double crochet both reach three loops, so the number of loops alone does not identify the finished stitch. Their pull-through sequence is the difference.
Turning chains: do they count as a stitch?
A turning chain gives you height for the next row. The pattern decides whether it counts as a stitch. Common starting conventions are ch 1 for single crochet, ch 2 for half double, ch 3 for double, and ch 4 for treble, but designers can use alternatives.
If a turning chain counts, it occupies a stitch position. Instructions commonly skip the first stitch beneath it and work into the top of the counted turning chain at the opposite edge. If it does not count, instructions commonly work into the first stitch beneath it and do not add a stitch into the turning chain at the far edge.
Read that rule before you begin. Mixing the two conventions is a common way to gain or lose stitches. The exercise below explicitly uses a turning chain that does not count.
Practice: a 10-stitch single crochet rectangle
This exercise uses US terms. It is a counting exercise, not a sized coaster or a tested gauge sample; its dimensions depend on your yarn, hook, and tension.
- Make a slip knot, then ch 11.
- Row 1: Sc into the back bump of the second chain from the hook. Sc into the back bump of each remaining chain. 10 sc.
- Place a marker in the top of the first and last sc. Turn the work and ch 1. This ch 1 does not count as a stitch.
- Row 2: Sc under both top loops of the first sc, then in each sc across. 10 sc. Do not work into the turning chain. Move the markers to the new first and last stitches.
- Repeat the turn, ch 1, and 10 sc for Rows 3–6. Count after every row.
- To finish, cut the working yarn leaving about 6 inches / 15 cm. Draw the cut end completely through the live loop and snug it gently. Weave the ends through the fabric with a yarn needle.
Your check is simple: six rows, with ten single crochet stitches in every row. If you count nine or eleven, stop at that row and find the missed or extra insertion before continuing.
Common beginner problems and fixes
| What you notice | What to check | What to try |
|---|---|---|
| The rectangle narrows | A missed first or last stitch | Mark both edges and count each row |
| The rectangle widens | Two stitches in one place, or an extra stitch in the turning chain | Find the extra stitch and undo back to it |
| The hook will not enter easily | Tight chain or stitches | Relax the grip; size loops on the shaft |
| The yarn splits | Hook passes through strands instead of the stitch opening | Undo that stitch and reinsert carefully |
| A dc looks like an hdc | All three loops were pulled through together | Finish dc with two separate pull-through-two movements |
| The edges have large gaps | Turning-chain method or uneven tension | Check the pattern’s chain-counting rule before changing it |
If your hands become uncomfortable, pause and relax your grip. Speed can wait; seeing the next insertion point is the useful skill to build first.
Basic stitches versus stitch patterns
The six basics are building blocks. A stitch pattern arranges stitches, spaces, and repeats to produce a texture. Moss stitch, shells, and granny clusters are examples of arrangements you can learn after the underlying stitches.
A front-loop-only or back-loop-only instruction changes where you insert the hook. An increase changes how many stitches you make in one location. These are additional instructions, not replacements for learning the basic stitch movement.
After your single crochet rows have a consistent count, practice half double crochet, then double crochet. Choose a pattern that states its terminology, turning-chain rule, and row counts. Return to this chart when you need to check an abbreviation.
Frequently asked questions
Which crochet stitch should beginners learn first?
Learn to make and count chains, then practice single crochet in rows. Slip stitch is also useful early for joining. You do not need to master all six before making a simple project with clear instructions.
Is slip stitch the same as single crochet?
No. A slip stitch draws the yarn through the work and the live loop. A single crochet pulls up a loop first, then uses another yarn over to draw through both loops.
How many crochet stitches are there?
There are many named stitches, variations, and combinations. “Six basic crochet stitches” describes a common beginner teaching set, not the total number of stitches in crochet.
Does the loop on the hook count as a stitch?
No. Count completed chains or stitches below the hook. Whether a turning chain counts is a separate question controlled by the pattern.
Can left-handed beginners use these instructions?
The yarn-over and pull-through sequences are the same. Hand positions and the direction you work are mirrored. Use clearly labeled left-handed visuals rather than copying a right-handed photograph’s direction literally.
Technical references
Terminology: Craft Yarn Council crochet abbreviations and US/UK equivalents. Pattern conventions: How to read a crochet pattern.
Movement references: Lion Brand’s lessons for chain stitch, slip stitch, single crochet, half double crochet, double crochet, and triple crochet.
Browse all our crochet stitch tutorials, or see every collection in learn-to-crochet guides.